Excel数字显示E+18怎么恢复正常
9465
2023-11-18
一个网站,其实说白了就是某几个特定功能的组合,而更换用户头像就在这些功能之中。今天就来做个测试,针对不同的用户,实现头像上传功能。
--------------------------------------------------------------------------------
成品图
思路
•针对不同的用户上传头像,我们要为每一个已登录的用户创建一个文件夹,文件夹的名称以当前用户的用户名为准。
•用户上传成功后,跳转到用户登录成功后的页面,并刷新用户头像。
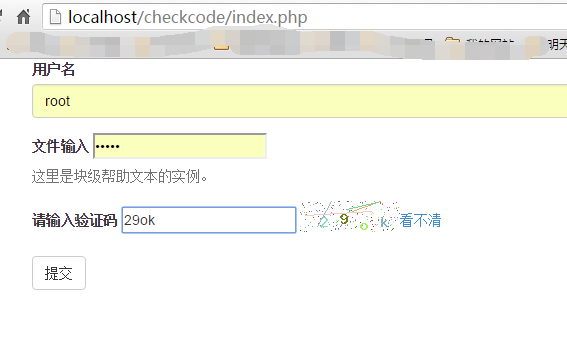
登陆页面
表单制作
<form role="form" action="./forindex.php">
 <div class="form-group">
 <label for="name">用户名</label>
 <input type="text" class="form-control" id="username" name="username"
  placeholder="请输入名称">
 </div>
 <div class="form-group">
 <label for="inputfile">文件输入</label>
 <input type="password" id="inputfile" name="password">
 <p class="help-block">这里是块级帮助文本的实例。</p>
 </div>
 <div class="form-group">
 <label>请输入验证码</label>
 <input type="text" id="checkcode" name="checkcode" />
 <img id="imagecheckcode" src="http://www.gimoo.net/t/1811/store.php&" /><a href="javascript:void(0);" onclick="change()" >看不清</a>
 </div>
 <script>
 function change(){
  document.getElementById("imagecheckcode").src = "http://www.gimoo.net/t/1811/store.php&"+ Math.random();
 }

 </script>
 <button type="submit" class="btn btn-default">提交</button>
</form>
验证码制作
<?php
session_start();// 必须在php的最开始部分声明,来开启session


// 使用gd的imagecreatetruecolor();创建一张背景图
$image = imagecreatetruecolor(100,40);

// 生成填充色
$bgcolor = imagecolorallocate($image,255,255,255);
// 将填充色填充到背景图上
imagefill($image,0,0,$bgcolor);

//////// 生成随机4位字母以及数字混合的验证码
$checkcode='';
for($i=0;$i<4;$i++){
 $fontsize = rand(6,8);
 $fontcolor = imagecolorallocate($image,rand(0,255),rand(0,255),rand(0,255));
 // 为了避免用户难于辨认,去掉了某些有歧义的字母和数字
 $rawstr = 'abcdefghjkmnopqrstuvwxyz23456789';
 $fontcontent = substr($rawstr,rand(0,strlen($rawstr)),1);
 // 拼接即将诞生的验证码
 $checkcode.=$fontcontent;
 // 避免生成的图片重叠
 $x += 20;
 $y = rand(10,20);
 imagestring($image,$fontsize,$x,$y,$fontcontent,$fontcolor);
}
// 保存到session变量中
$_SESSION['checkcode']=$checkcode;

// 生成一些干扰的点,这里是200个
for($i=0;$i<200;$i++){
 $pointcolor = imagecolorallocate($image,rand(50,255),rand(50,255),rand(50,255));
 imagesetpixel($image,rand(0,100),rand(0,30),$pointcolor);
}
// 生成一些干扰线 这里是4个
for($i=0;$i<4;$i++){
 // 设置为浅色的线,防止喧宾夺主
 $linecolor = imagecolorallocate($image,rand(50,255),rand(50,255),rand(50,255));
 imageline($image,rand(0,99),rand(0,29),rand(0,99),rand(0,29),$linecolor);

}


header('content-type:image/png');

imagepng($image);

// 释放资源,销毁执行对象
imagedestroy($image);
JavaScript刷新验证码
<a href="javascript:void(0);" onclick="change()" >看不清</a>
<script>
 function change(){
  document.getElementById("imagecheckcode").src = "http://www.gimoo.net/t/1811/store.php&"+ Math.random();
 }
</script>
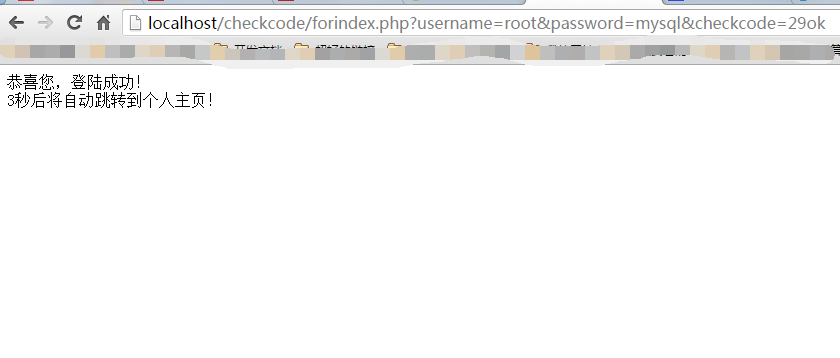
验证页面
由于本次试验最核心的是对用户头像的更换,所以用户名我们暂且不管,以Root为准。
验证逻辑
<?php
 session_start();
 header("Content-Type:text/html;charset=utf-8");

 $username = $_REQUEST['username'];
 $password = $_REQUEST['password'];
 if(strtolower($_REQUEST['checkcode']==$_SESSION['checkcode'])){
 if(!is_dir($username)){
  mkdir($username);
 }
 echo "恭喜您,登陆成功!"."<br />3秒后将自动跳转到个人主页!";
 $_SESSION['username'] = $username;
 header("refresh:3;url=./personalpage.php");


 }else{
 echo "对不起,登陆失败了!";
 header("refresh:3;url=./index.php");
 //echo "<script>window.location.href='http://www.gimoo.net/t/1811/index.php'</script>";
 }
页面跳转
在PHP中,要先实现页面的跳转,有很多方式。本文使用了增加header信息的方式,下面介绍几个关于页面跳转的小实例。
header函数
< ?php
//重定向浏览器
header("Location: http://blog.csdn.net/marksinoberg");
//确保重定向后,后续代码不会被执行
exit;
?>
注意:Location和:之间不能有空格
Meta标签
< meta http-equiv = "refresh" content = "1;url=http://blog.csdn.net/marksinoberg" >
注意: content可以控制在几秒之内完成跳转。
JavaScript
< ?php
$ url = "http://bbs.lampbrother.net" ;
echo " < script language = 'javascript'
type = 'text/javascript' > ";
echo " window.location.href = 'http://www.gimoo.net/t/1811/$url' ";
echo " < /script > ";
?>
注意: 使用JavaScript方式,代码放置的位置可以随意,只要是符合语法要求即可。
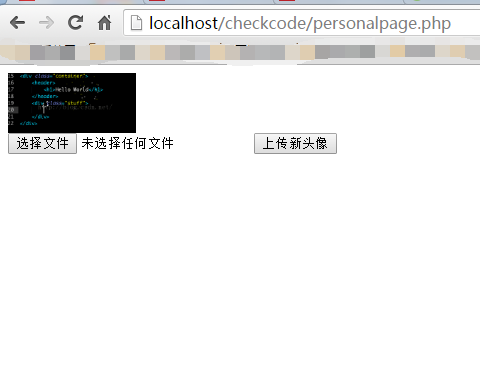
上传页面
个人主页
<!DOCTYPE html PUBLIC "-//W3C//DTD XHTML 1.0 Transitional//EN" "http://www.w3.org/TR/xhtml1/DTD/xhtml1-transitional.dtd">
<html xmlns="http://www.w3.org/1999/xhtml">
<head>
<meta http-equiv="Content-Type" content="text/html; charset=utf-8" />
<title><?php session_start(); echo $_SESSION['username']."的个人主页"; ?></title>
<style>
 img {
 width:128px;
 height:auto;
 }
</style>
</head>

<body>

<div>
 <img id="userphoto" src="http://www.gimoo.net/t/1811/root/lover.png" /><br />
 <form action="./uploadphoto.php" method="post" enctype="multipart/form-data">
 <input type="file" name="photo" />
 <input type="submit" onclick="uploadphoto()" value="上传新头像"/>
 </form>
 <script>
 function uploadphoto(){
  document.getElementById("userphoto").src = "http://www.gimoo.net/t/1811/root/<&'username'];?>.png"
 }
 window.onload = function(){
  uploadphoto();
 }

 </script>
</div>


</body>
</html>
上传核心
上传的核心还是一个表单,我们把要进行上传的图片上传到服务器,然后php使用move_uploaded_file来实现文件的迁移,实现上传。
<?php
 session_start();
 header("Content-Type:text/html;charset=utf-8");
// 附件的存储位置、附件的名字
$path = "./root/";

$username = $_SESSION['username'];
// 拼接成该文件在服务器上的名称
$server_name = $path.$username.".png";


if($_FILES['photo']['error']>0) {
 die("出错了!".$_FILES['photo']['error']);
}
if(move_uploaded_file($_FILES['photo']['tmp_name'],$server_name)){
 //echo "<BR>"."Upload Success!";
 echo "恭喜您,上传成功!"."<br />3秒后将自动跳转到个人主页!";
 header("refresh:3;url=./personalpage.php");
}else{
 //echo "<BR>"."Upload Failed!".$_FILES['photo']['error'];
 echo "对不起,上传头像失败了!";
 header("refresh:2;url=./index.php");
}
?>
最终结果
登陆页面
验证结果
个人主页
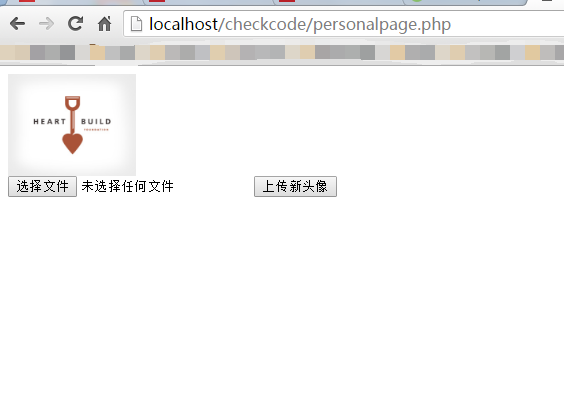
最新头像
总结
回顾一下,本次试验的收获。
•session的开启必须在php文件的开头session_start()
•php可以实现的页面跳转的方式
•上传文件
•验证码制作与使用
•JavaScript:void(0);的使用核心
大致的内容就是这么多,虽然没有增加美化效果,但是麻雀虽小,五脏也算是俱全了。
以上就是本文的全部内容,希望对大家的学习有所帮助,也希望大家多多支持绿夏网。
#免责声明#
本站[绿夏技术导航]提供的一切软件、教程和内容信息仅限用于学习和研究目的;不得将上述内容用于商业或者非法用途,否则,一切后果请用户自负。本站信息来自网络收集整理,版权争议与本站无关。您必须在下载后的24个小时之内,从您的电脑或手机中彻底删除上述内容。如果您喜欢该程序或内容,请支持正版,购买注册,得到更好的正版服务。我们非常重视版权问题,如有侵权请邮件[lxwl@lxwl520.cn]与我们联系进行删除处理。敬请谅解!